How to Set Up Homebrew to Install & Update Open-Source Tools
A Linux/Unix environment without a package manager means a lot of extra work on your part. So without a good package manager, any additions to the system will need to be compiled from source. Yes, you already have the Mac App Store on your macOS hacking computer, but most of the open-source pentesting tools we rely on as hackers and security professionals are not available there.
It costs developers money to submit to the Mac App Store, and the code must be reviewed and accepted by Apple before it can be published. For some developers, this is too much of a hassle. This means we need another package manager to pull down free software such as Hydra, Aircrack-ng, GNU Coreutils (if you're like me and prefer Linux flags to Unix flags), or some dependencies for tools located on GitHub.
Why Having No Package Manager Sucks
If I wanted to compile Aircrack-ng from source on my macOS machine, first I would need to verify that I had all of the dependencies, and that they were in the correct locations and functioning properly. I would then need to download the source for Aircrack-ng, configure it, and begin the compilation process, resolving any issues I ran into on the way.So, What Package Manager Should You Use?
There are a few package managers for macOS such as Macports and Nix, but I prefer Homebrew. The syntax is very straightforward, it's fast, the packages are well-maintained and up to date, and it leverages more of macOS's default libraries instead of redundantly installing new ones. Also, everything is owned by a regular user, meaning there is no need to use sudo. But best of all, Homebrew is clean, with everything kept in its own sandbox in /usr/local.With this pacakage manager, the source or binaries are pulled down with their requirements met. Homebrew then keeps track of what has been installed, what is using it, and where it is located. It also keeps track of configuration information and makes the whole process of maintaining open-source software on your Apple product a piece of cake.
Step 1Install Homebrew
Our first step is to get Homebrew from the site http://brew.sh. Before installing, though, we should review the source on GitHub. Generally, I don't like piping a script off the internet, but I trust their repository. It's on GitHub, I can read the source code, and the author doesn't have access to the internals of the GitHub servers to muck about with the timing and detect cURL pipes.Open up iTerm on your Mac and execute this command:
- /usr/bin/ruby -e "$(curl -fsSL https://raw.githubusercontent.com/Homebrew/install/master/install)"
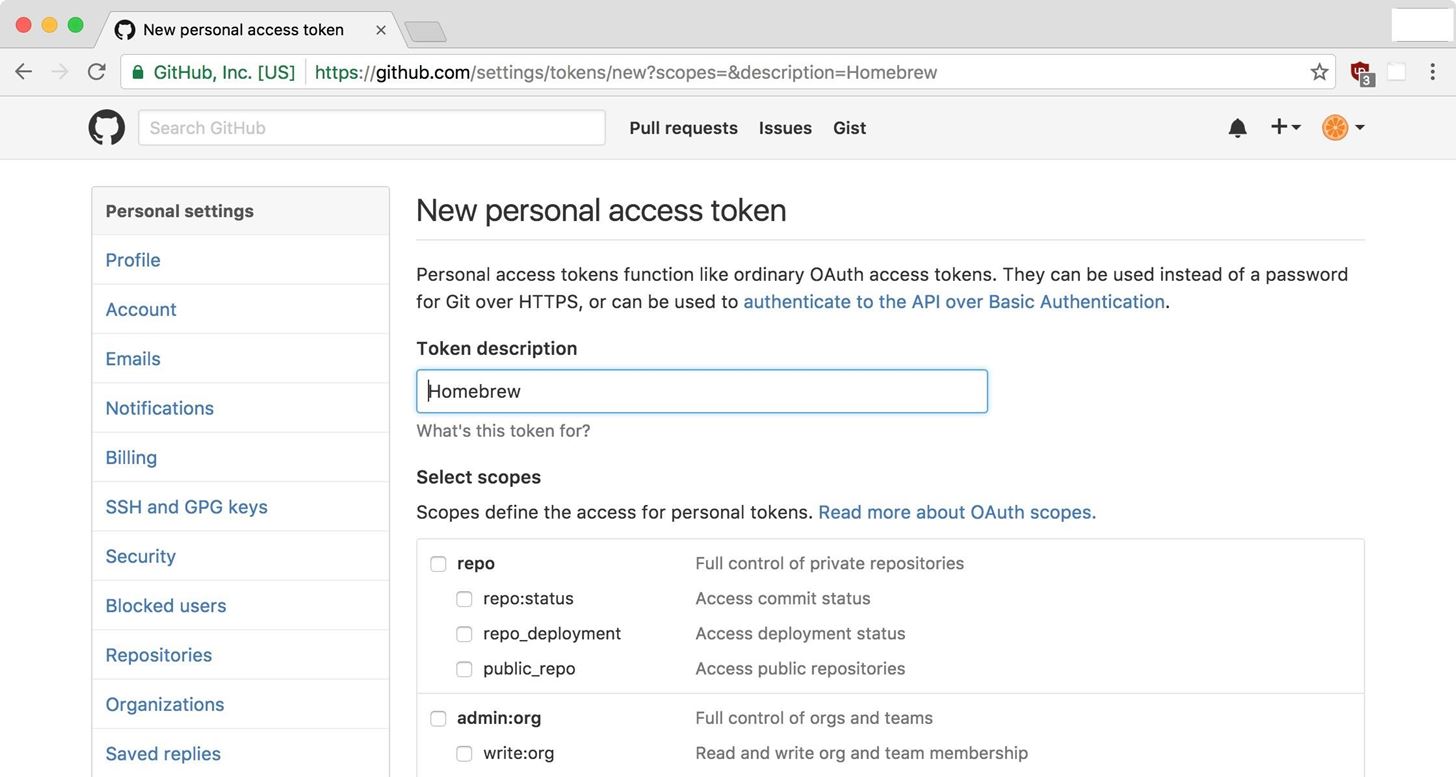
Step 2Create an Access Token
If you search the brew repository often enough, you will want an access token since the GitHub API rate limits queries to their servers.Step 3Add the Token
We're going to have to edit a few Bash files in your home directory to get the token working, both the .bashrc and .bash_profile files. The .bashrc file is the configuration file for Bash, the default shell on macOS. The .bash_profile file is a personal initialization file executed for login shells (SSH or from the console) whereas .bashrc is the individual per-interactive-shell startup file.While we could just edit the .bash_profile and that's it, I prefer to keep all of my Bash settings in .bashrc, which ensures that no matter how the shell is spawned, I have my preferences set. Setting my .bash_profile to source my .bashrc means that if I login from SSH, I will have the same environment as my local terminal.
To use Vim, open a new iTerm window, or type in cd to get to your home directory, then type in the following command. (If you don't have a .bashrc file yet, you can create one first with touch .bashrc).
- vim .bashrc
- export HOMEBREW_GITHUB_API_TOKEN="YOUR_TOKEN_HERE"
Next, let's edit your .bash_profile. Type in the following command. (If you don't have a .bash_profile yet, you can create one first with touch .bash_profile).
- vim .bash_profile
- source .bashrc
Next, let's tell Bash to execute the commands in the .bashrc file as if they were executed on the command line.
- source ~/.bashrc
Step 4Understanding Homebrew
Homebrew has a similar feel to Linux package managers, and it's fairly easy to run. First we'll use help to see some quick info on getting started.- brew help
Now let's go through the steps for installing a package. I have selected the popular brute-force tool Hydra. First, we'll search to ensure Hydra is available. The command is:
- brew search hydra
- brew info hydra
- brew install hydra --with-gtk+


Comments
Post a Comment