How to Use Git to Clone, Compile & Refine Open-Source Hacking Tools
Git is currently the most widely used version control system (VCS) in the world, mainly due to GitHub. Version control systems record changes to a file or set of files over time so that you can recall specific versions later. Git is a distributed form of version control, where each system, not just a central location, has a full repository.
Projects hosted on GitHub, or your own personal remote repositories, are fully mirrored when they are cloned. This means that when you pull down a repository, you get all of the files contained in it, you can make changes and commit them back to your own fork of the project, clone different versions, or just clone and compile. You can even push your changes into staging for the main project.
Many open-source projects rely on GitHub, even the Linux kernel. Lots of popular hacking tools also host their source on GitHub. If you don't already have an account, you should create one.
Git is built into macOS, so we won't have to download anything. I'll be covering the bare basics in this article, just enough to get us off the ground modifying some code and maintaining our own local repositories. By using Git, we will be able to clone popular open-source hacking tools, compile them, and even make changes or push bug fixes!
Step 1Clone Some Source Code (git clone)
The git clone command is what we'll be using to pull source off of GitHub. It's probably the most common command you'll use as a pentester, unless you also do development on the side. In order to use this command, simply find a repo (I selected theHarvester) and execute the following command, swapping out the repo I chose with whatever you chose.- git clone https://github.com/laramies/theHarvester
Step 2Initialize a New Repository (git init)
The git init command allows us to initialize a directory as a Git repository, allowing us local version control of our projects in development. I created a simple project and initialized the directory into a local repo with:- git init
Step 3Add Files for Tracking (git add)
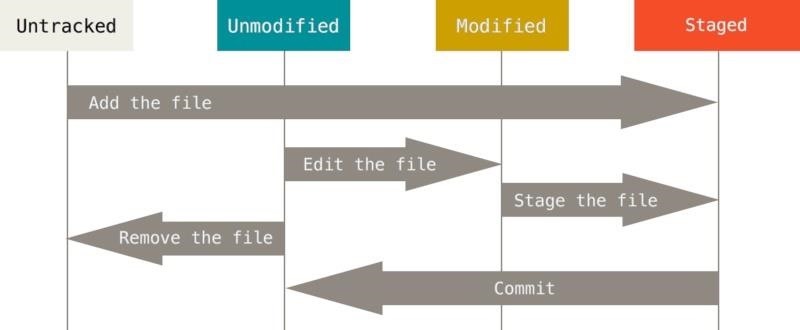
Now that I have an initialized folder, it's time to add the files for tracking. I'll do this with:- git add *
Step 4Commit the Source Code (git commit)
Once I'm satisfied with the state that my files are in. I will commit the changes using the command:- git commit -a -m 'changed some core UI components'
Step 5See What's Up with Your Repo (git status)
Sometimes we leave projects for a long time, and other times it's just difficult to keep track of what's happening. Luckily, we can find out the status of the repository with:- git status
Step 6Add & Test New Features (git branch)
Branches allow you to add or test new features without making changes to the stable code base. For example, my hackThePlanet.py has been committed and it's currently stable, but I want to add some new experimental features without breaking anything in the stable version. In that case, I would use the command:- git branch experimental
- git checkout experimental
- git checkout -b experimental
Step 7Add Those Features or Fixed to the Master (git merge)
Since everything went so well with our changes, it's time to merge my branches back together. First, I checkout the master branch using:- git checkout master
- git merge experimental
And That's How You Use Git for Your Repos
This is a very basic intro to working with Git. There are many powerful features that I did not cover here. I only touched on what was necessary to work with your own local repositories on your machine. Git is capable of so much more, especially when used in conjunction with GitHub.While some of you may not ever use these features, it's important to know they are there. There are times in pen-testing where you will have to modify a PoC (proof of concept) or get a piece of code working on your system. If you find yourself doing this kind of work, these basics will help to keep your workflow organized. As with most commands, git is extremely well-documented. Commands like git branch --help will open man pages specific to the command. I suggest reading through these.


Comments
Post a Comment